IntuneCDとは?
Intuneの設定ファイルを取得、テスト環境等のIntune設定と比較し、本番Intune環境へ適用するIntuneCDというものがあります。
結構使いやすそうだなと思ったので、テストしてみました。
GitHubリポジトリの説明から引用
IntuneCD, short for Intune Continuous Delivery, is a powerful Python package designed to facilitate the backup and update of configurations in Intune. With a primary focus on seamless integration with pipelines, it enables users to maintain a comprehensive history of configuration changes and track specific setting modifications.
https://github.com/almenscorner/IntuneCD
設定手順
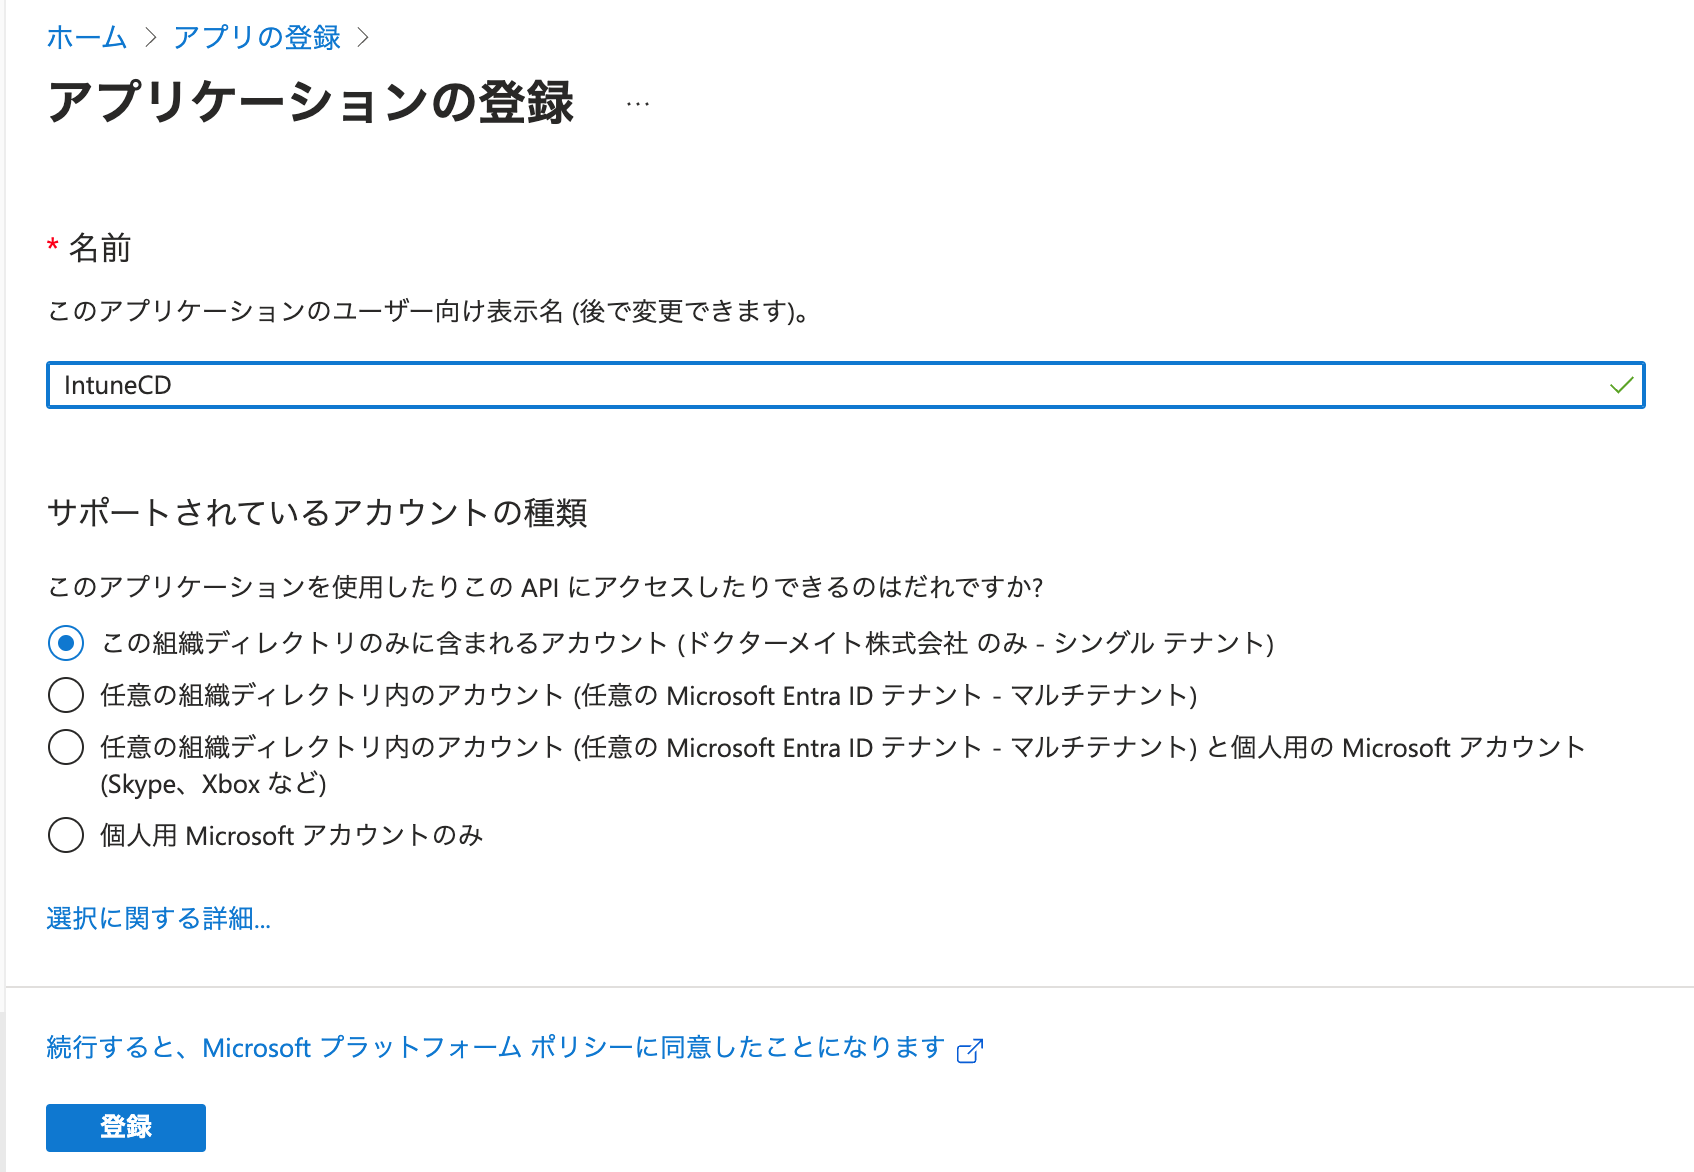
アプリの登録
- Microsoft Entra管理センターへアクセスします。
- 「アプリケーション」→「アプリの登録」→【新規登録】をクリックします。
- 名前を入力し、【登録】をクリックします。
- 「APIのアクセス許可」→【アクセス許可の追加】をクリックします。
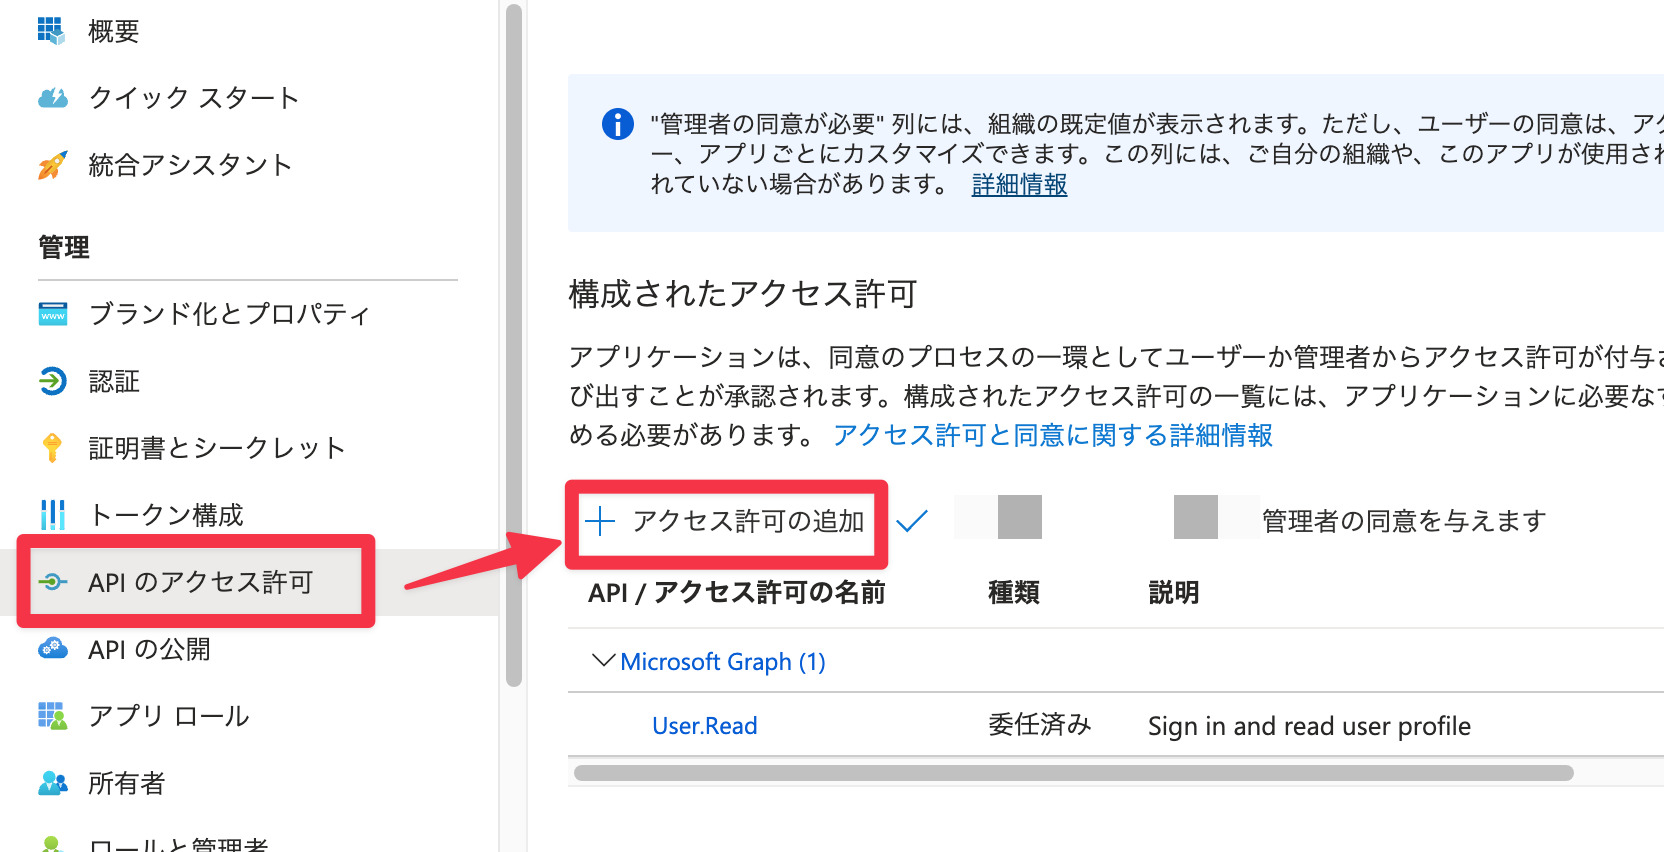
- 「Microsoft Graph」を選択し、「アプリケーションの許可」を選択します。
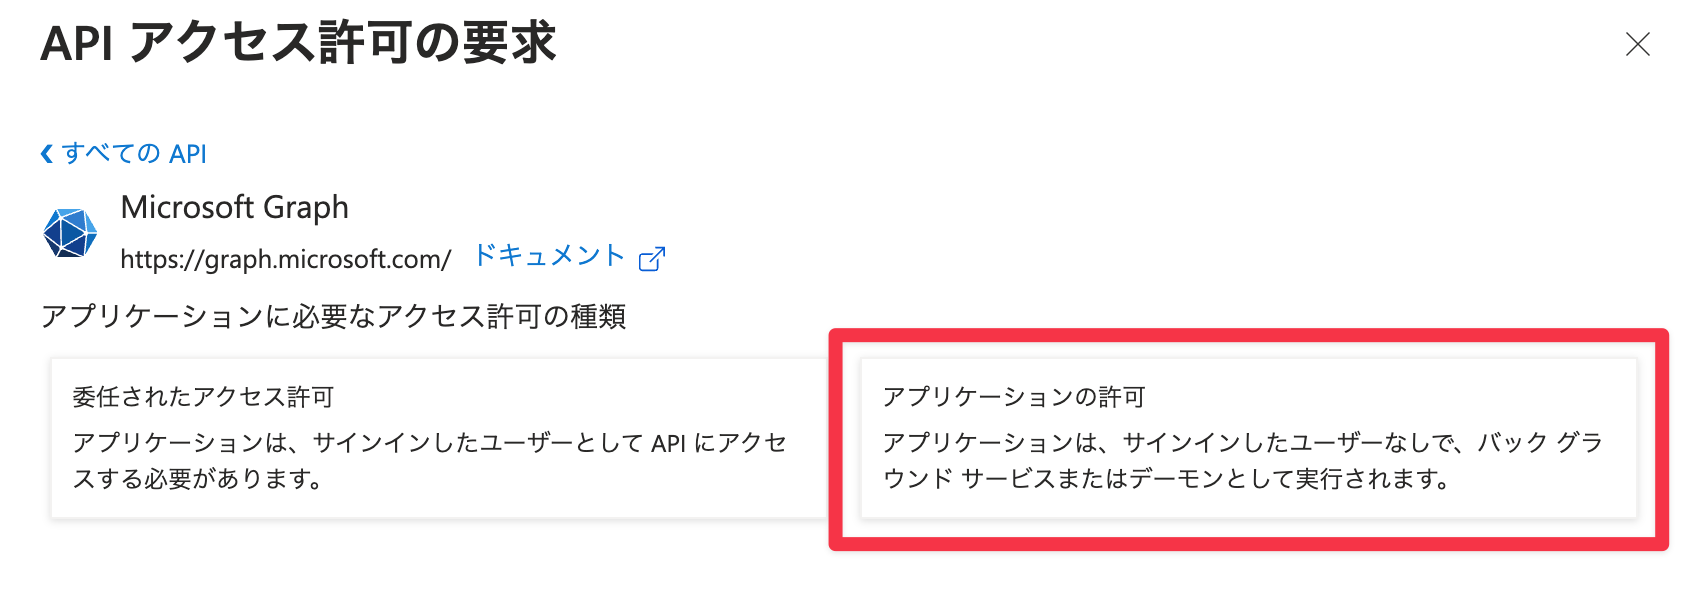
- 以下の権限を追加し、【アクセス許可の追加】をクリックします。
- DeviceManagementApps.ReadWrite.All
- DeviceManagementConfiguration.ReadWrite.All
- DeviceManagementServiceConfig.ReadWrite.All
- DeviceManagementManagedDevices.ReadWrite.All
- Group.Read.All
- Policy.Read.All
- Policy.ReadWrite.ConditionalAccess
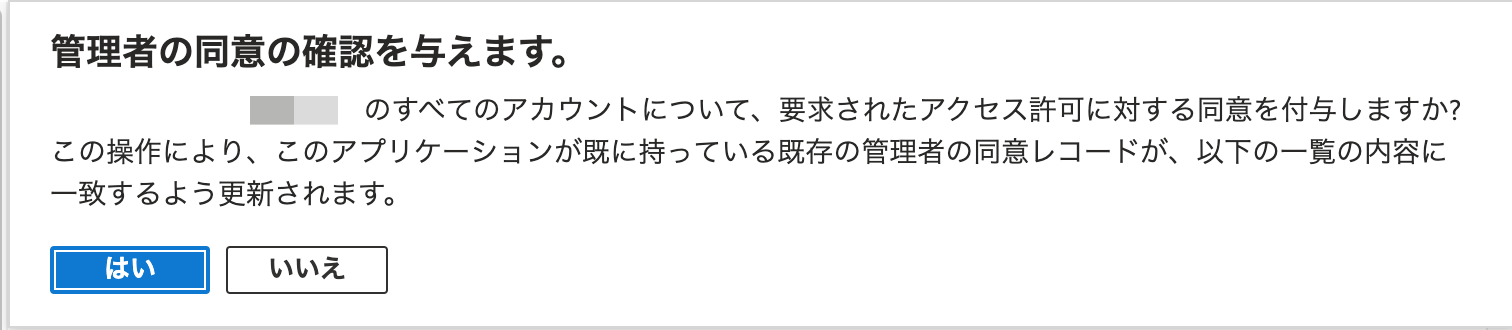
- 【「組織名」に管理者の同意を与えます】をクリックし、【はい】をクリックします。
IntuneCDのインストール
以下のコマンドを実行します。
pip3 install IntuneCDバージョンアップされた際には、以下のコマンドでアップデートできるようです。
pip3 install IntuneCD --upgradeIntuneの設定をバックアップする
ローカルで実行するための手順で記述します。
シークレットキーの作成
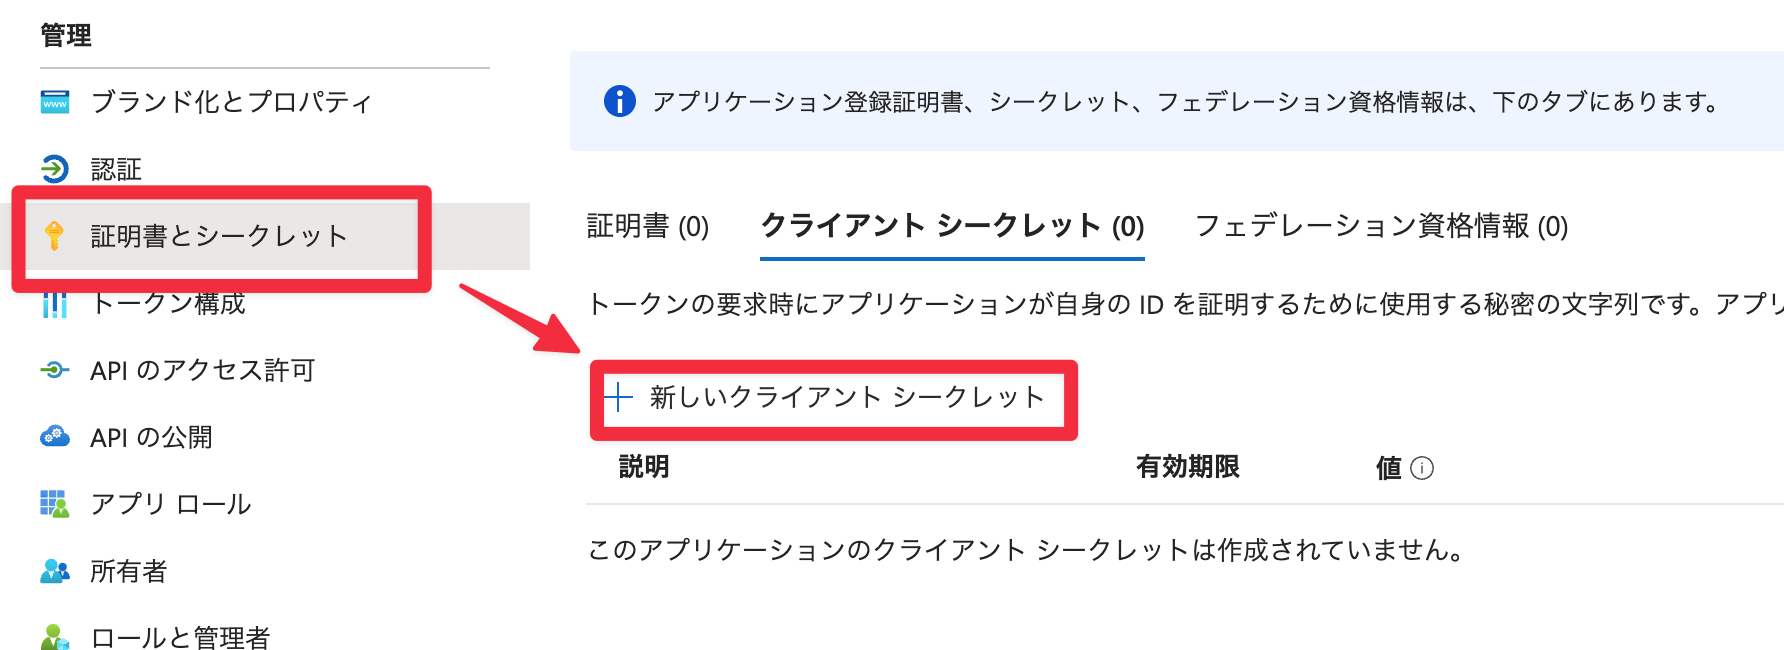
- 先程作成したEntraアプリを開きます。
- 「証明書とシークレット」→【新しいクライアントシークレット】をクリックします。
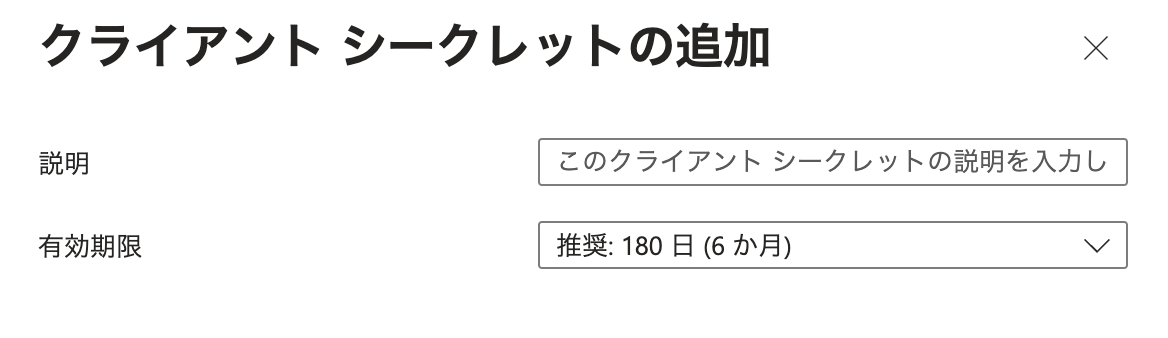
- 「説明」を入力し、有効期限を選択して、【追加】をクリックします。
- 作成されたシークレットキーを控えておきます。
認証ファイルの作成
以下の内容で、jsonファイルを作成します。
ここではファイル名をauth.jsonとしました。
公式ドキュメントにもありますが、検証環境用として、DEV_TENANT_NAME, DEV_CLIENT_ID, DEV_CLIENT_SECRETを指定して作成するものもあります。
{
    "params":{
        "TENANT_NAME": "example",
        "CLIENT_ID": "XXXXXXXX-XXXX-XXXX-XXXX-XXXXXXXXXXXX",
        "CLIENT_SECRET": "作成されたシークレットキー"
    }
}
Intune設定のバックアップ手順
以下のコマンドを実行し、Intuneの設定をバックアップします。
ここでは、-e オプションを利用してバックアップしない設定項目を指定しています。
詳細については、公式ドキュメントを参照してください。
IntuneCD-startbackup -a auth.json -m1 -o json -p ./ -e {APNs,AppleEnrollmentProfile,ManagedGooglePlay}実行すると以下のように設定ファイルのバックアップが開始されるので、完了するまで待ちます。
Backing up Application: 7-Zip 23.01 (x64 edition)
Backing up Application: Adobe Acrobat Reader DC
Backing up Application: Company Portal
Backing up Application: Google Chrome
Backing up Application: GoogleJapaneseInput
Backing up Application: Slack
Backing up Application: Zoom(64bit)
Backing up compliance policy: WIn10/11コンプライアンスポリシー
Backing up Device Management Settings
Backing up Notification message template: EnrollmentNotificationInternalMEO
Backing up profile: Endpoint Protection
Backing up profile: Win_MDEOnboarding
-p オプションで指定した場所に、json形式で出力されるので、出力内容を確認します。
今回は、 -p ./ と指定しているので、IntuneCD-startbackupを実行した場所に出力されているはずです。
%ls -l
drwxr-xr-x  7 hikky  staff     224  9 21 07:31 Applications
drwxr-xr-x  3 hikky  staff      96  9 21 07:31 Assignment Report
drwxr-xr-x  5 hikky  staff     160  9 21 07:31 Compliance Policies
drwxr-xr-x  5 hikky  staff     160  9 21 07:31 Conditional Access
drwxr-xr-x  9 hikky  staff     288  9 21 07:31 Device Configurations
drwxr-xr-x  3 hikky  staff      96  9 21 07:31 Device Management Settings
drwxr-xr-x  5 hikky  staff     160  9 21 07:31 Enrollment Configurations
drwxr-xr-x  4 hikky  staff     128  9 21 07:31 Enrollment Profiles
drwxr-xr-x  3 hikky  staff      96  9 21 07:31 Group Policy Configurations
drwxr-xr-x  7 hikky  staff     224  9 21 07:31 Settings Catalog
以上で設定のバックアップは完了です。
アップデートの実行
何もないまっさらなIntuneテナントを用意し、そちらに設定が適用できるかを試してみました。
取得した設定ファイルがあるフォルダで、以下のコマンドを実行します。
当然ですが、auth.jsonの内容を適用したいテナントの情報に変更するか、新しい認証用ファイルを作成し、引数で指定してください。
一旦レポートモード ( -r ) を付与して実行します。-p で適用したい設定ファイルへのパスを指定してください。
IntuneCD-startupdate -a auth.json -m 1 -r -p ./どの設定ファイルが適用されるかの一覧が表示されます。
***Running in report mode, no updates will be pushed to Intune***
------------------------------------------------------------------------------------------
Compliance Policy not found, creating Policy: WIn10/11コンプライアンスポリシー
------------------------------------------------------------------------------------------
***Device Management Settings is only available with interactive auth***
------------------------------------------------------------------------------------------
Notification template not found, creating template: EnrollmentNotificationInternalMEO
------------------------------------------------------------------------------------------
Profile not found, creating profile: Endpoint Protection

- 中略 -
問題がなければ、レポートモードオプションを外し実行します。
IntuneCD-startupdate -a auth.json -m 1 -p ./すると今度は作成までされているので、それぞれのIDが結果として表示されてきていますね。
------------------------------------------------------------------------------------------
Compliance Policy not found, creating Policy: WIn10/11コンプライアンスポリシー
Updating assignments, added assignments:
intent: , Filter ID: None, Filter Type: none, target: All Devices
Compliance Policy created with id: XXXXXXXX-XXXX-XXXX-XXXX-XXXXXXXXXXXX
------------------------------------------------------------------------------------------
***Device Management Settings is only available with interactive auth***
------------------------------------------------------------------------------------------
Notification template not found, creating template: EnrollmentNotificationInternalMEO
Notification template created with id: XXXXXXXX-XXXX-XXXX-XXXX-XXXXXXXXXXXX
------------------------------------------------------------------------------------------
Profile not found, creating profile: Endpoint Protection
Profile created with id: XXXXXXXX-XXXX-XXXX-XXXX-XXXXXXXXXXXX
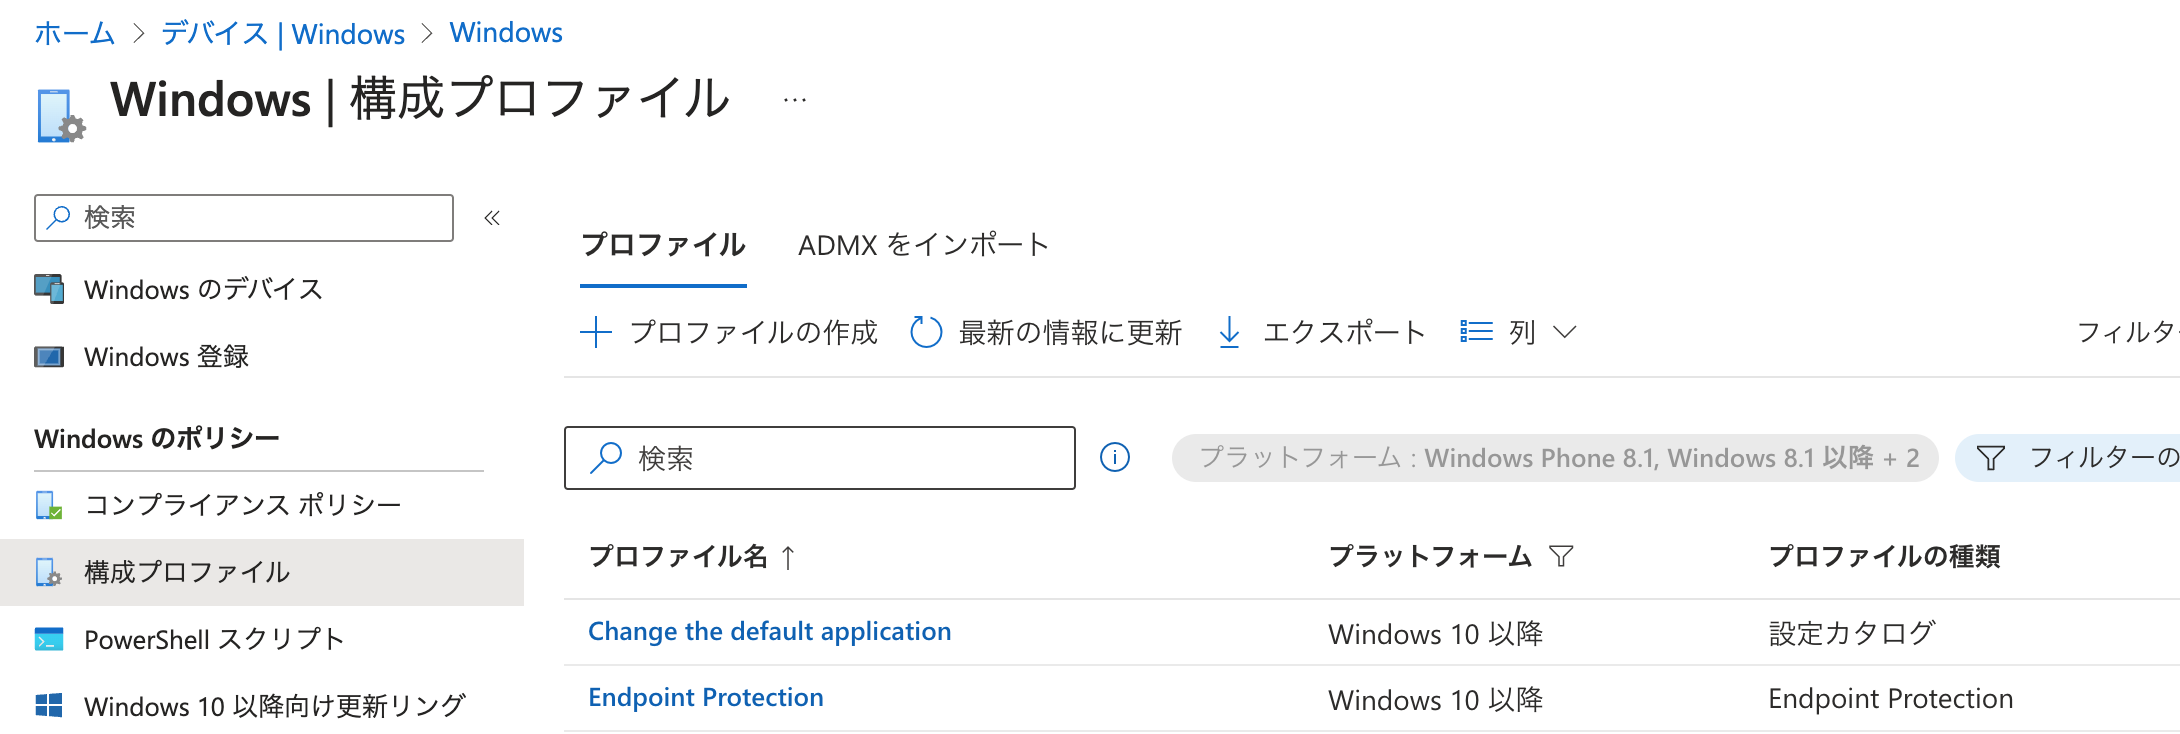
------------------------------------------------------------------------------------------Intune管理センターで確認してみると、問題なく設定がされていることがわかります。
まとめ
色々なツールがありますが、IntuneCDはコマンドから簡単に実行できるので便利ですね。
GitHub等と組み合わせて、テスト環境で設定追加→IntuneCDでbackup→レビュー→本番適用のようなPipelineで実行するのがいいと思いますが、JSONとかYAMLでIntuneの設定を把握できる人がどれだけいるのか・・・。という気がしますね(笑)
どこを変更したかの履歴を残すという意味ではとてもいいと思います。
また、IntuneCD Monitorというフロントエンドツールもリリースされているので、そちらも試してみたいと思っています。